Adding Result Metadata
Adding Result Metadata Below the Extract
In this chapter, you will add metadata below the extracts in each result. Specifically, these are extracted entities, so there will typically be more than one value displayed for each.
When you execute a search in Mint, the out-of-the-box results list includes an extract of the retrieved document.

For each result, you will add the Executive Titles and Events metadata, if any, below the result extract.
If you are using your own Sinequa instance, you should modify these values for your own selected metadata.
- Go to src > app > pages > search > all > search-all.component.html.
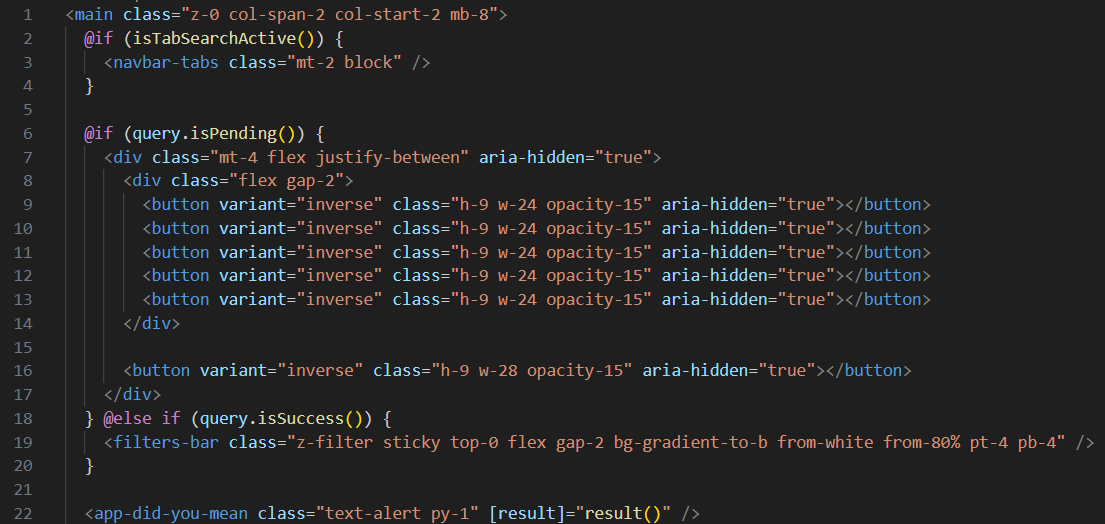
You should see code similar to this, detailing the elements that can appear on the search page, which displays the results of a search.
- Look for the following line of code:
<ng-container *ngComponentOutlet="getArticleType(article.docformat)!; inputs: { article, strategy: 'replace' }" />
The ngComponentOutlet allows you to control the component creation process.
Here, the getArticleType() function retrieves the docformat (i.e., document type) for each article.
Based on the docformat type, different components can be displayed for different document types.
Each documentType and its components can be found in src > app > registry > document-type-registry.ts, which is where you can also add new document types and specify the components that should be displayed for those document types.
It is also possible to add other inputs like customMetadata here as well, which is what you will do in this exercise.
-
Go to src > app > pages > search > all > search-all.component.ts.
-
Inside the SearchAllComponent class, define the following metadata property:
  metadata = [
    { title: 'Executive Titles', field: 'exectitle' },
    { title: 'Events', field: 'event' }
  ];
Each title will display a label for the metadata.
The field uses a column alias, which is defined in the Advanced tab of the Mint Query Web Service on the Sinequa demo server.
If you are using your own Sinequa instance, you should modify these values for your own selected metadata.
-
Go back to src > app > pages > search > all > search-all.component.html.
-
Modify
<ng-container *ngComponentOutlet="getArticleType(article.docformat)!; inputs: { article, strategy: 'replace' }" />
to include customMetadata as follows:
<ng-container *ngComponentOutlet="getArticleType(article.docformat)!; inputs: { article, strategy: 'replace', customMetadata: metadata }" />
- Save your changes.
If you followed the Connection to the Sinequa demo server tutorial, Mint should recompile automatically. If not, execute the npm run start command in the terminal.
- Go to your Mint application and search for Walmart.
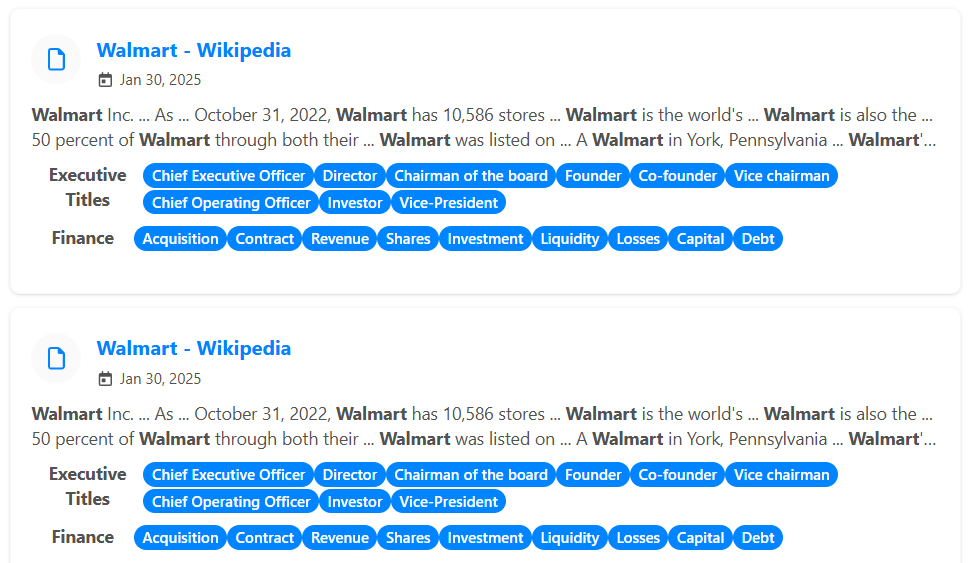
You should now see the Executive Titles and Events metadata displayed below each result's extract.
Adding Result Metadata Above the Extract
You may have noticed that some metadata displays above the extract by default.
If you go to src > app > components > cards > record > record-card.html, you will see the default results metadata code starting at about line 28. (Note: line numbers can change over time to look at the provided image and search for similar blocks of code in this file.)
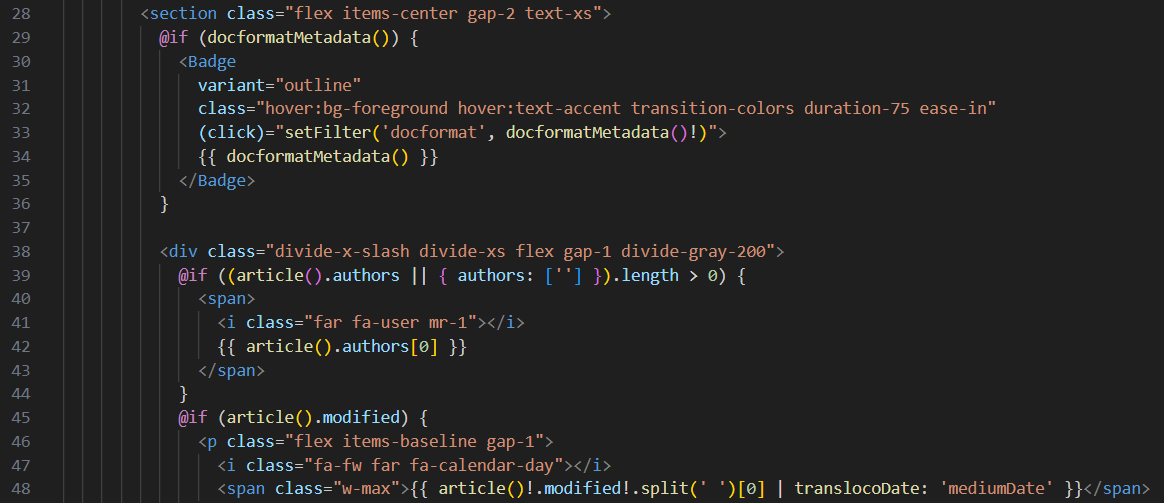
The current default results metadata includes docformat, authors, and modified. Because of the IF statements, these metadata will only display if present for that specific result.
You can include additional metadata here above the extract such as the filename as follows:
-
Look for the closing section tag below these metadata code blocks.
-
Before this tag, paste the following:
@if (article()['filename']) {
 <p class="flex items-baseline gap-1">
 <i class="fa fa-file"></i>
 <span class="w-max">{{ article()['filename'] }}</span>
  </p>
}
- Save your changes.
If you followed the [Connection to the Sinequa demo server tutorial](020_connection.md, Mint should recompile automatically. If not, execute the npm run start command in the terminal.
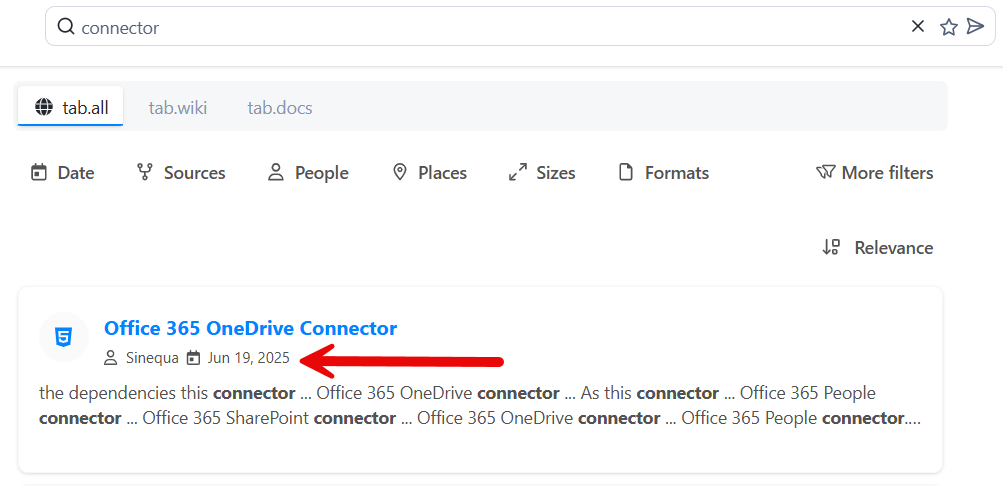
- Go to your Mint application and search for connector.
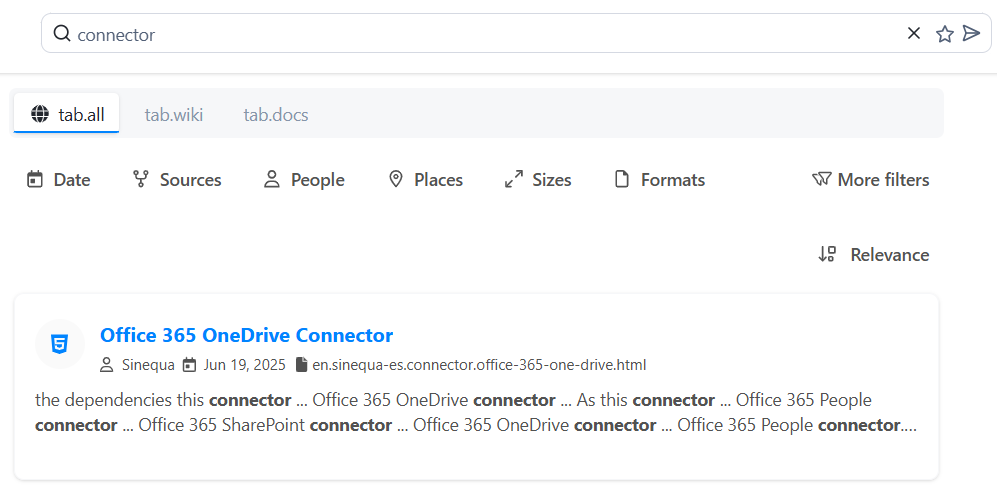
You should now see the filename above the extract.