Server configuration
Minimum configuration
The minimum configuration required to get started is an App and a Query web service.
To create an App configuration, in the administration:
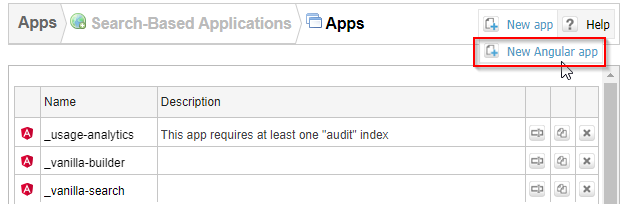
- Go to Search-based applications > Apps,
- In Apps, click New Angular app, give it a name then click Ok. You will be redirected to the configuration page of the new App. It is also pre-filled with the default web services.
- If you want to use a different Query web service other than the default one, click Edit, and in the list of Queries, choose your web service and save.
At this point, your Sinequa server can be used to develop an SBA, and you can start the development guide or spend more time reading the documentation below to learn more about fully configuring the server.
Apps
In order to work, an SBA needs a named App configuration to exist on the Sinequa server. This configuration is the entry point which references all the Web Services that the SBA will use. The App can also contain configuration (in JSON format) which may be passed to the Angular application. Finally, the App can be restricted to specific Users and Groups, rather than being open to all.
The list of Apps can be found in the administration interface under Search-Based Applications > Apps:
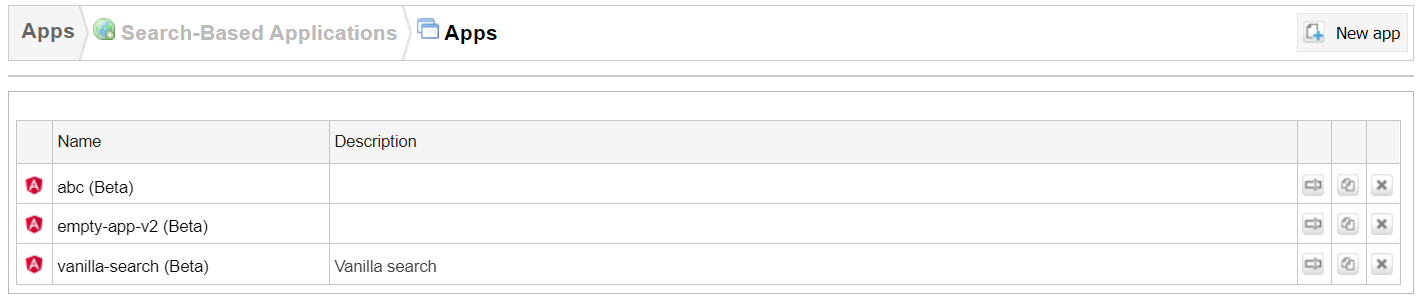
In this form, a new App may be created by clicking on the New Angular App button.
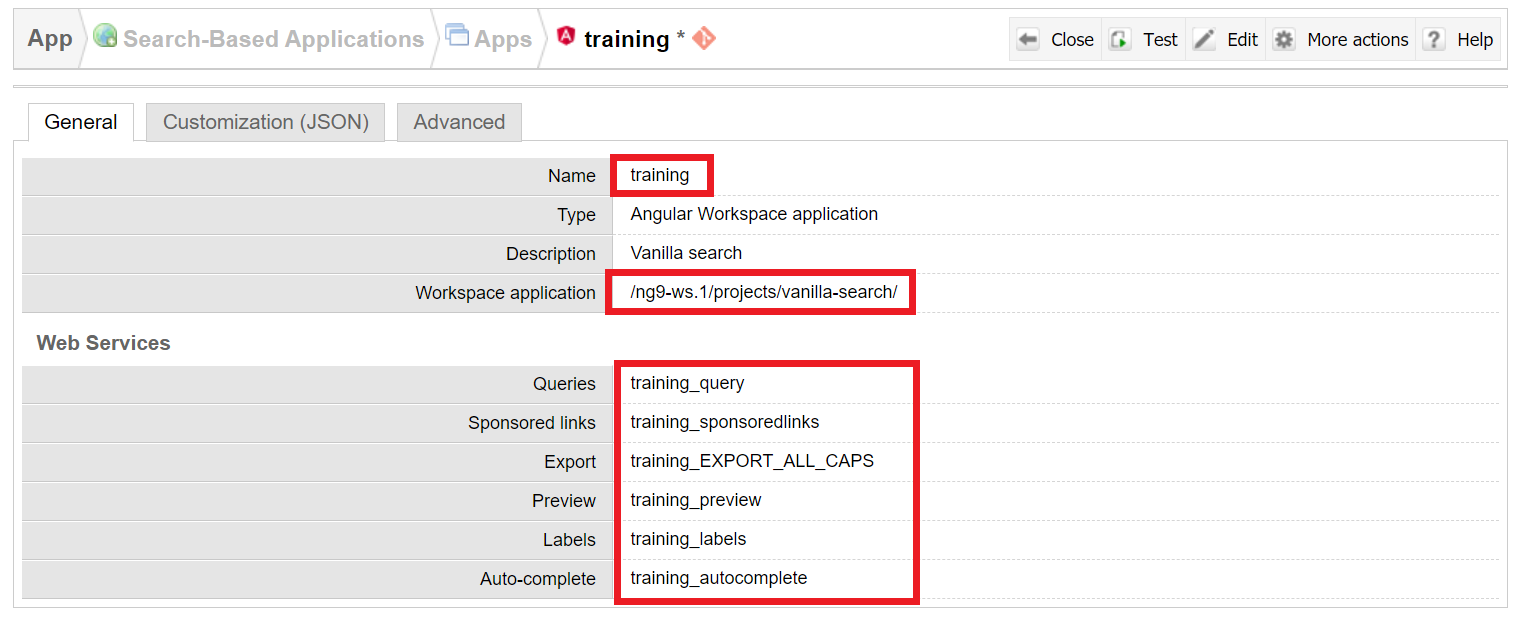
The name of the App is important, as it will be used by the Angular application to request data via the Web Services. The configuration of an App specifies the list of Web Services available for this App. If the App is deployed on the Sinequa server, it needs to point to an Angular workspace, which is shown via the property Workspace application.
In the Customization (JSON) tab of the App configuration, it is possible to write data (in JSON syntax), which will be passed to the Angular app on initialization. The benefit of using this field (rather than just writing the data in the app source code) is that this data may change without having to recompile the Angular app. For example, if you specify a list of widgets to be displayed, you will only need to modify this field and refresh the page to visualize the difference.
The underlying Monaco editor can verify that your JSON is valid and in any case, Sinequa ES verifies the JSON validity when saving the App configuration and notifies you should the JSON be not valid.

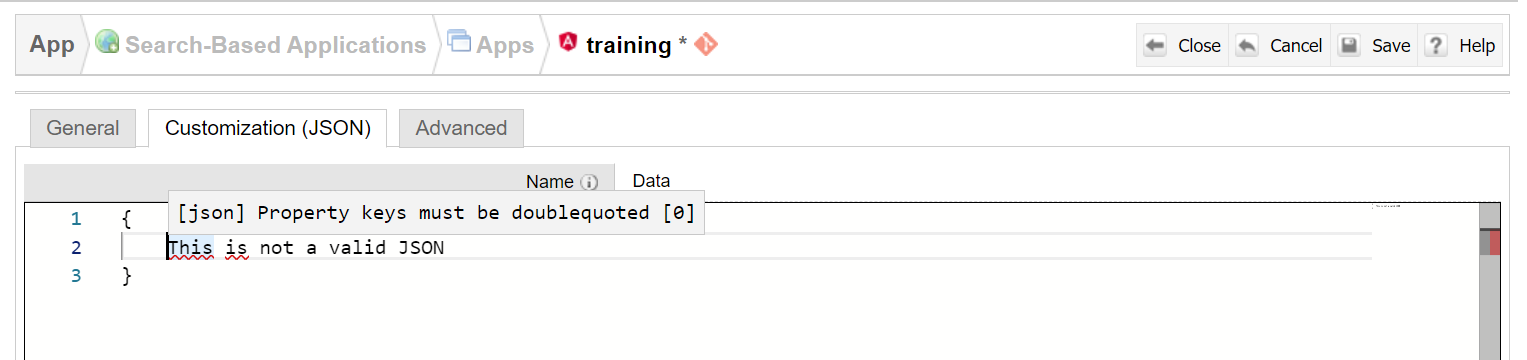 App configuration - Customization (JSON) tab - when the JSON is not valid
Please refer to Tips & tricks - Server-side-configuration for an example of how to use the JSON data to customize vanilla-search.
In the Advanced tab of the App configuration, it is possible to restrict the availability of the app to certain users and groups. You can also assign the current App configuration as the default Angular app for a user or a group. This default Angular app is used when the assigned user navigates on the Sinequa server without specifying the app that they want to use.
 App configuration - Advanced tab
Web Services
The Web Services configurations allow you to configure the behaviour of certain endpoints of the REST API, which allows:
- To minimize the size and complexity of the requests sent to the server
- To prevent exposing sensitive or internal parameters and settings to the client side, which could be used maliciously or impact negatively the overall performance of Sinequa ES.
The list of Web Services can be found in the administration interface under Search-Base Applications > Web Services
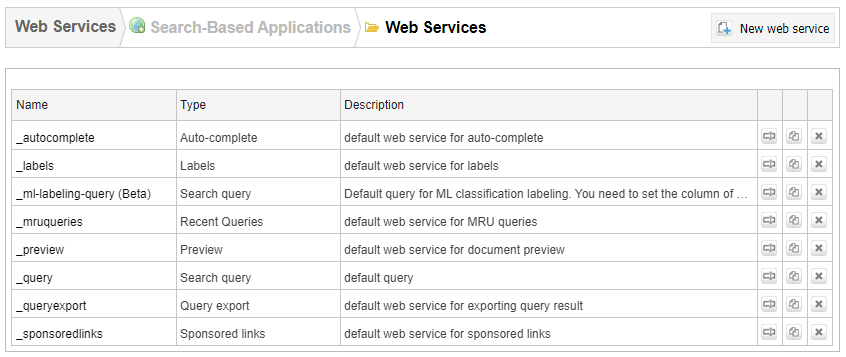 List of configurable Web Services in the Sinequa server administration
Query web service (default: _query)
The Query web service is one of the most integrated and sophisticated web service of Sinequa. It is at the heart of our application samples, Vanilla Search and Pepper. This service allows to build complex search queries (incl. tabs, facet selection, advanced search, etc.) to retrieve data from the Sinequa indexes.
The General tab of the Query web service configuration allows the configuration of these key parameters:
- Index list: The list of indexes which this web service may query.
- QueryPlugin: A server-side plugin (written in C#), which lets you customize the search queries, or post-process the responses.
- Aggregations: A list of Aggregations. An aggregation is a short-list of metadata computed for the given query. For example, if you search for "automobile manufacturer", the Company aggregation could contain entries like "Volkswagen", "BMW", "Tesla", etc.
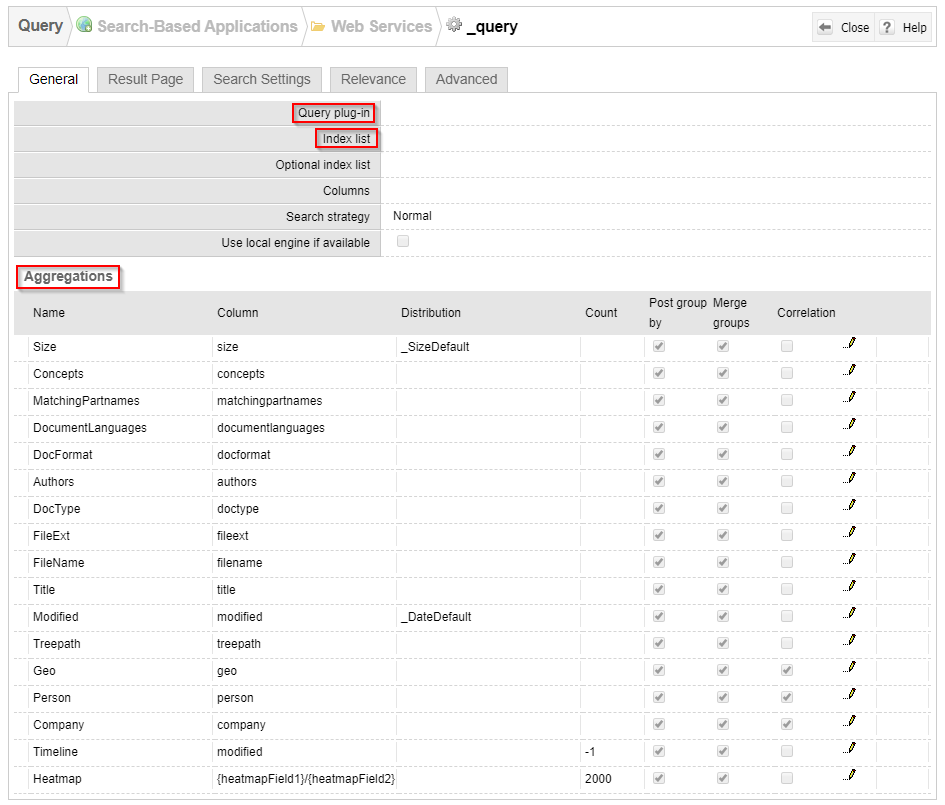 Query Web Service configuration - General tab
The Results Page tab of the Query web service configuration allows to configure these key parameters:
- Tab Search: Specifies a list of tabs to search in a specific subset of the corpus.
Tabs filter on a single column of the index (e.g. the format of document, name of the data source, etc.).
The Angular application may select a tab by setting
query.tab = '<tab name>'. - Search scopes: A "scope" can restrict the search to a specific subset of the corpus, with SQL rules.
The Angular application may select a scope by setting
query.scope = '<scope name>'. Unlike tabs, it is not possible to compute the number of documents for each scope with one query (since each scope has a specific ruleset). - Relevant Extracts: The relevant extracts are key passages and sentences found in the searched documents, which are then used to compute a short summary typically displayed in the search results.
 Example of relevant extracts
The Search settings tab of the Query web service configuration allows to configure in fine detail the query sent to the Sinequa engine. In particular:
- Analysis of the user query:
- Language detection & dictionaries
- Intent detection
- Entity detection
- Custom SQL:
- Custom columns (SELECT)
- Custom filters (WHERE)
- Duplicate removal (GROUP BY)
- Sorting options (ORDER BY)
- Other options:
- Calculation of most relevant "Concepts"
- Similar document search settings
The Relevance tab of the Query web service configuration allows to configure in fine detail the relevance calculations performed by the Sinequa engine. In particular:
- The statistical part of the relevance (global score formula, words & forms weighting)
- The freshness score (favoring most recent content)
- The part name weights (favoring specific parts of the content)
- The class weights (favoring specific classes of content)
- The relevance transforms (allowing for custom forms of relevance, such as popularity, ratings or importance)
- The relevance feedback model (allowing to account for user feedback)
The Advanced tab of the Query web service configuration allows to configure meaningful aliases and labels for specific columns. This is useful to avoid exposing the bare structure of the index to front-end developers. Instead, developers will see and use explicit variable names, which are used consistently across the different web services.
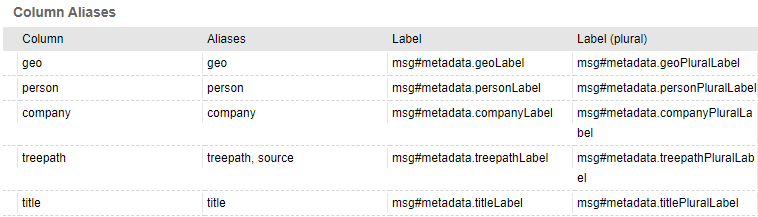 Example of query aliases
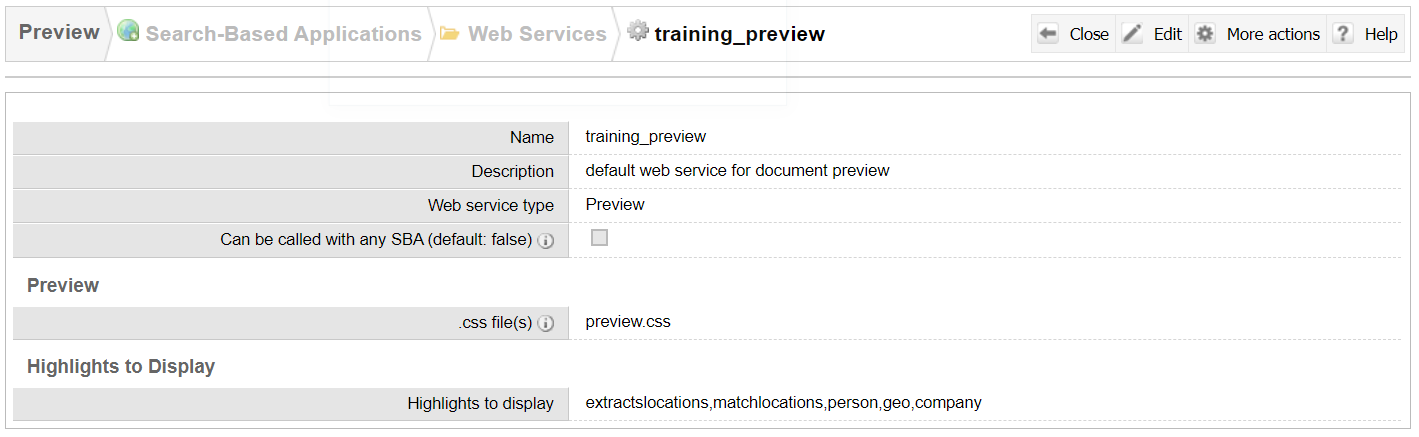
Preview web service (default: _preview)
The Preview web service form configures the access to document HTML previews (stored in Sinequa document cache). It has two settings:
- .css file: Contains one (or more) CSS file names that are injected in the HTML previews as
<link>elements, either with a relative path (relative to the URL of the application), or an absolute URL. The default SBA includes apreview/preview.scssfile which is built as/preview.css. The default setting is thereforepreview.css. - .js file: Contains one (or more) JS file names that are injected in the HTML previews as
<script>elements, either with a relative path (relative to the URL of the application), or an absolute URL. The default setting ispreview/preview.js. This is packaged by default in the SBA workspace. It is necessary to let the SBA interact with the content of the preview. - Highlights to display: Categories to be "highlighted" in the preview.
For example, relevant extracts are highlighted by wrapping
<span>tags around the relevant text. The visual highlight itself is effectively done by the aforementionedpreview.cssfile (for example with a CSS rule of the typebackground-color: yellow;).
 Example of preview configuration
 Example of a highlighted HTML (each colored passage corresponds to a <span> element with a specific highlighted entity class)
Labels web service (default: _labels)
The Labels web service form allows to configure the columns of the index where tags are stored. Labels may be private (specific to each user) or public (visible to everyone). Both options may be enabled simultaneously.
It is possible to restrict specific actions (Label creation, label modification) to specific populations of users.
This service also exposes an auto-complete feature to easily search and select a specific label.
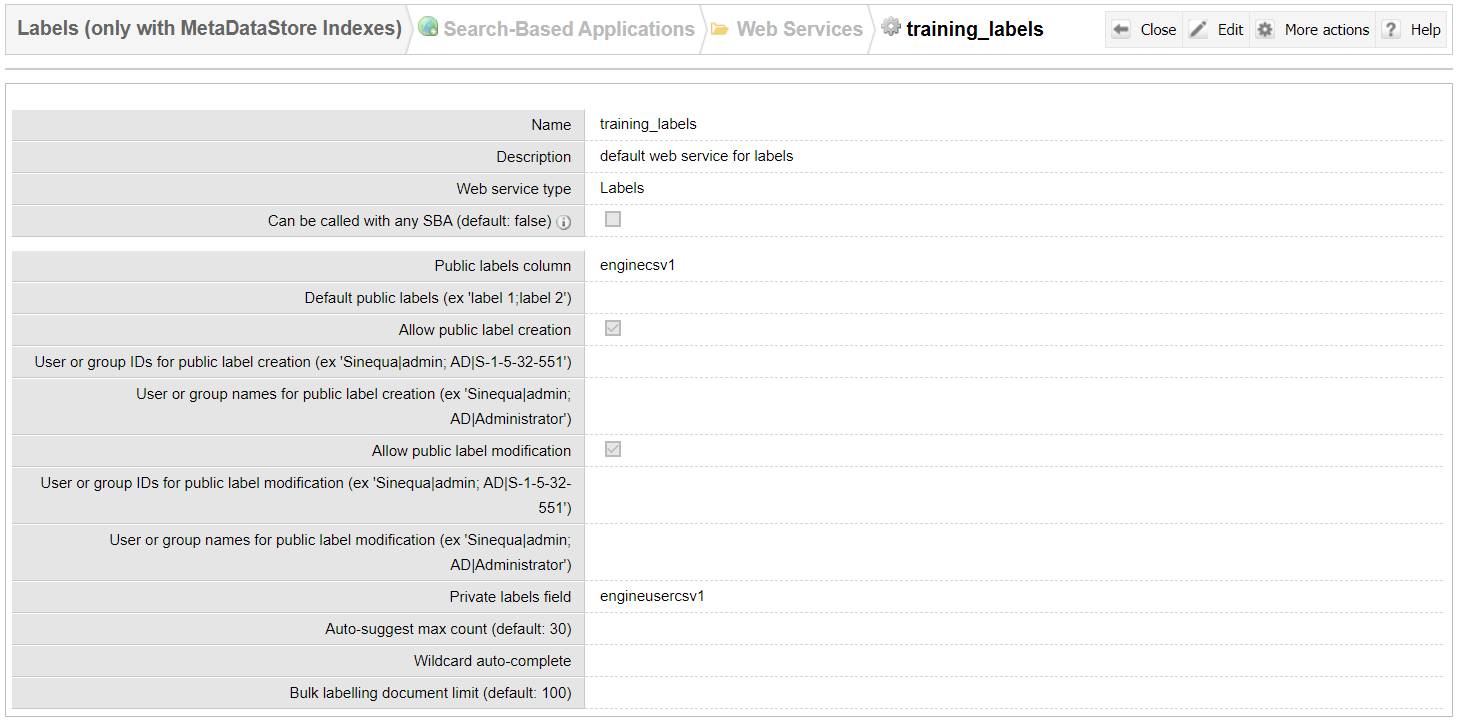 Example of labels configuration
Auto-complete web service (default: _autocomplete)
The auto-complete web service essentially lists suggest queries that provide suggestions when the user types some text in a form. Refer to the documentation on suggest queries for more information.
The last option "Match the search terms anywhere in field values" is useful for the facet component's search bar: A search for "York" will match both "New York" and "Yorkshire" values. However this option comes incurs a performance penalty, so it should be used only when necessary.
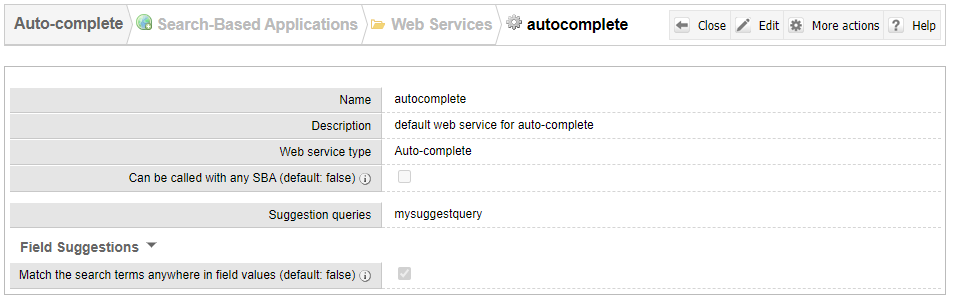 Example of auto-complete configuration
Export web service (default: _queryexport)
The export web service specifies the list of columns and maximum number of lines (records) to be exported when a user requests an export of the results list. For obvious security and performance reasons, these parameters are not exposed directly to the user themselves.
Note that this web service is always used with the query web service. The latter provides the query configuration to retrieve the documents that user sees in the SBA. Therefore, the number of exported records is also limited by the configuration of the associated query web service. In particular, the query configuration can limit the maximum number of records per index that can be returned by the query.
You need to verify such options in the query web service when you change the maximum number of lines in the export web service.
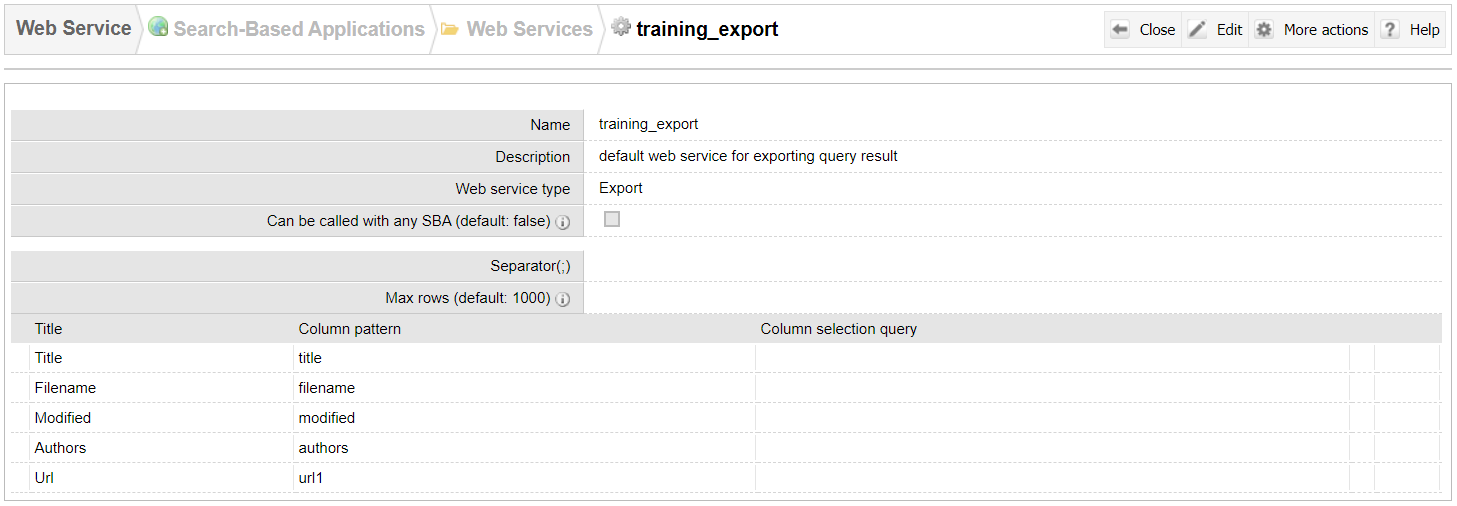 Example of export configuration
Sponsored links service (default: _sponsoredlinks)
The configuration of the sponsored links specifies the number of links returned by the API. Refer to the documentation on sponsored links for more information.
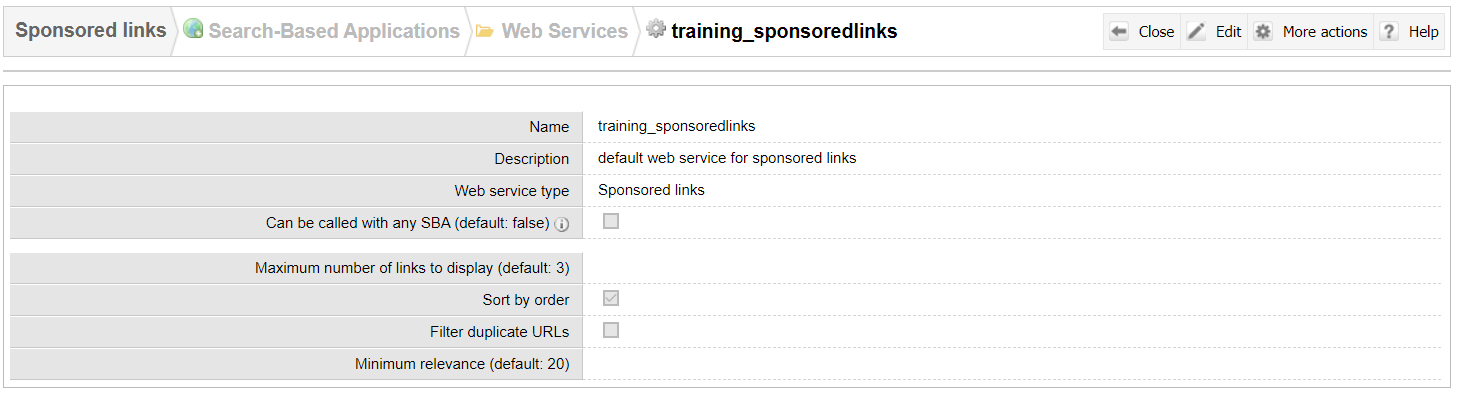 Example of Sponsored links configuration
Workspaces
The third part of the server-side configuration that powers the SBA framework is the Workspaces section. "Workspaces" literally refer to Angular workspaces, (which is what this Github repository contains).
The SBA Framework includes an Angular workspace available on Github, which is also shipped with Sinequa releases as a zip file. This archive can be unzipped, downloaded and uploaded on the Sinequa server via the Sinequa administration.
The workspaces are located in <Sinequa data folder>\sba, which is where Sinequa looks for them, to display their content in the administration and to serve the built applications that they contain. This is also where you would deploy your application for Sinequa to serve it (via an upload, or a git pull -- See Workspace).
The Workspaces section displays the workspaces under <Sinequa data folder>\sba. It is located in the administration under Search-Based Applications > Workspaces:
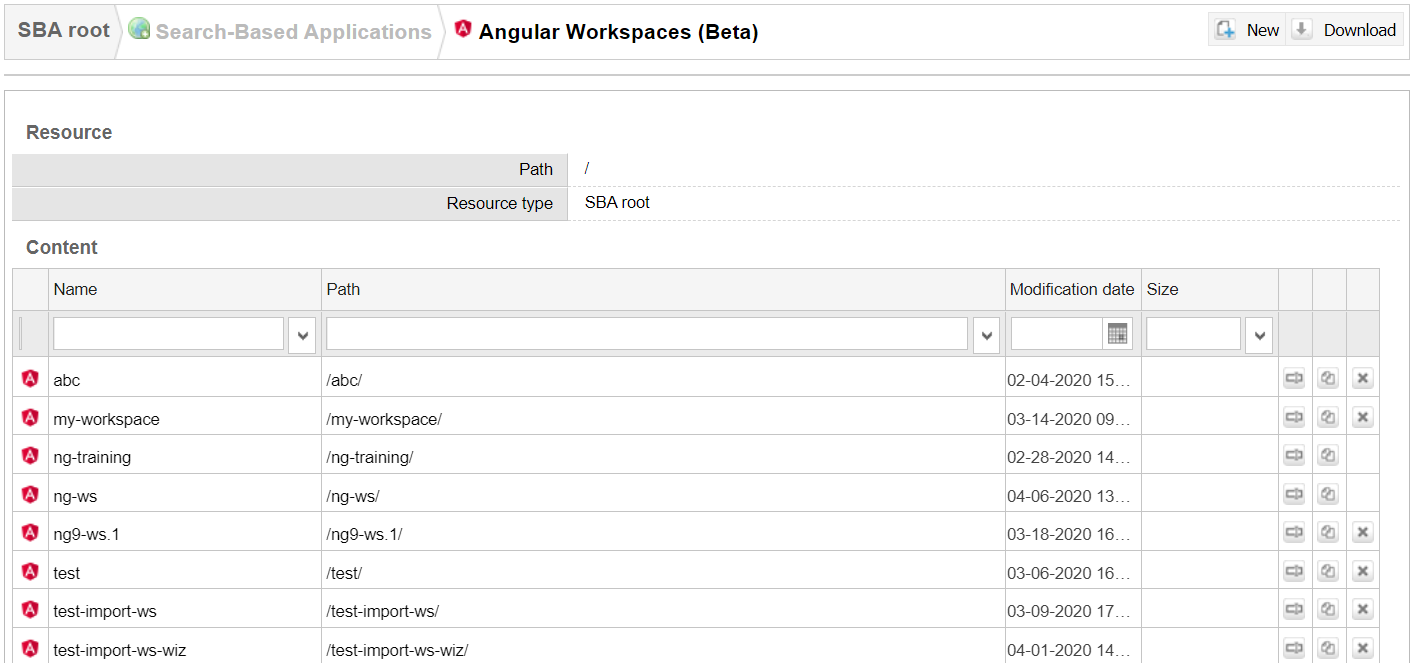 Angular workspaces in the administration
At the start, there will be no workspace pre-loaded in Sinequa ES. You can:
- either load the default Sinequa Angular workspace from a default zip provided with your Sinequa release,
- or clone the Github repository in
<Sinequa data folder>/sba(See Workspace), - or import your own Angular workspace, noting that only multi-project Angular workspaces are supported (cf. multi-project Angular workspace for more information about Angular workspace type).
Unzip the Sinequa Angular workspace
To unzip the default Sinequa workspace, click New > Unzip default Angular workspace
 'Unzip default Angular workspace' action
You will be prompted to choose a name for your workspace. This process can take a few minutes. You can follow its progress either by looking at the banner on the top of Workspaces administration page or by going to Tasks status page, the progress status is named UnzipAngularWorkspace.
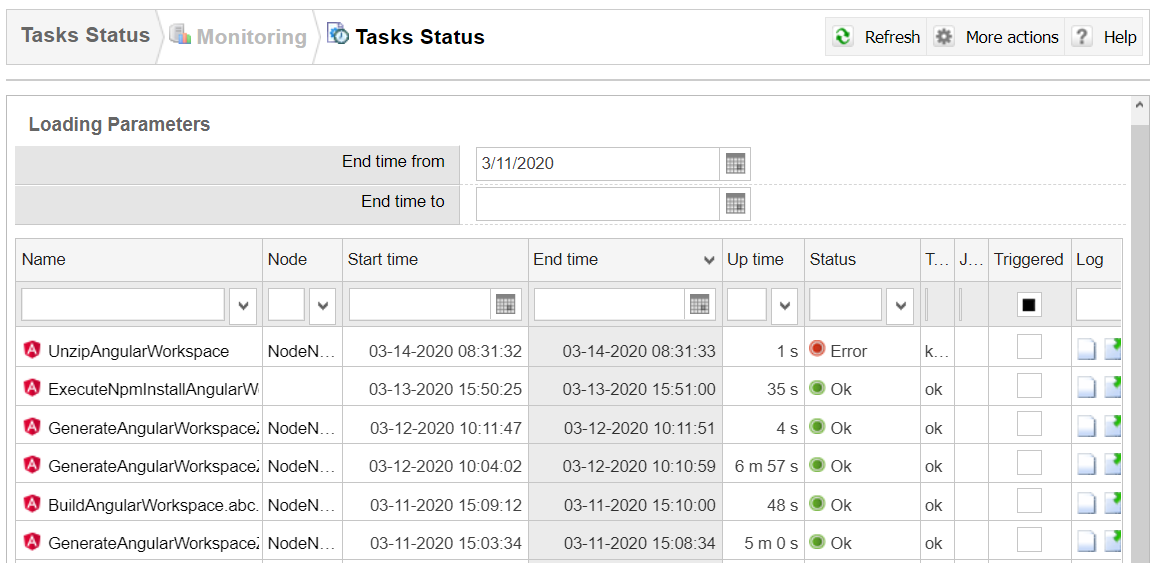 Status of 'Unzip default Angular workspace' action in Tasks status
Upload your Angular workspace to Sinequa ES
:::warning IMPORTANT:
Please verify with the administrator of your Sinequa server that the size of your zip does not exceed the upload size limit of the server. If it is the case, the server will refuse the upload request with HTTP 413 (Request Entity Too Large). :::
This size limit is controlled in IIS by the option maxAllowedContentLength:
<requestFiltering>
  <requestLimits maxAllowedContentLength="<limit-in-bytes>" />
</requestFiltering>
To import your workspace, click New > Import Angular workspace
 'Import Angular workspace' action
A wizard will be shown to guide you through the import procedure.
First you need to provide the zip of your workspace. You can only import one workspace at a time. Then choose the name of the exported workspace. If you want to overwrite an existing workspace, remember to tick the checkbox Overwite existing workspace. Otherwise, the wizard will not let you continue with the import procedure.
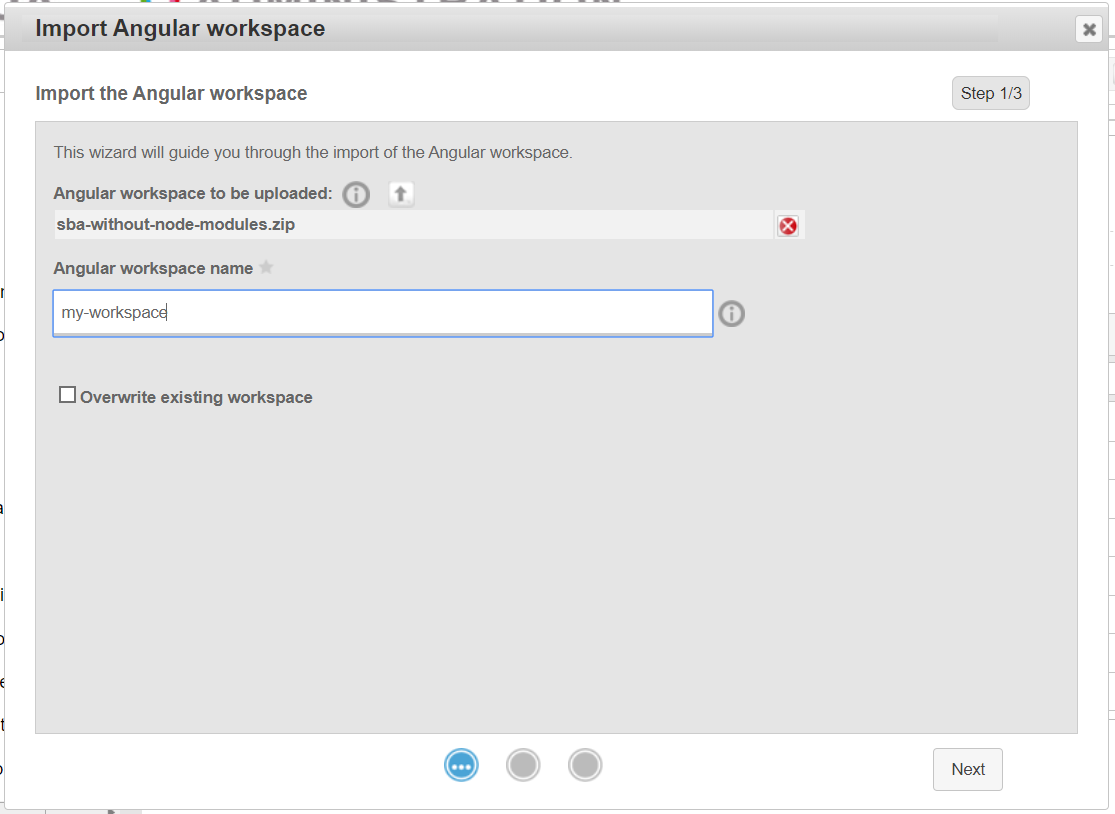 'Import Angular workspace' wizard - page 1
Once you have finished, click on Next. The next page provides you a summary of the steps that will be executed to import your workspace.
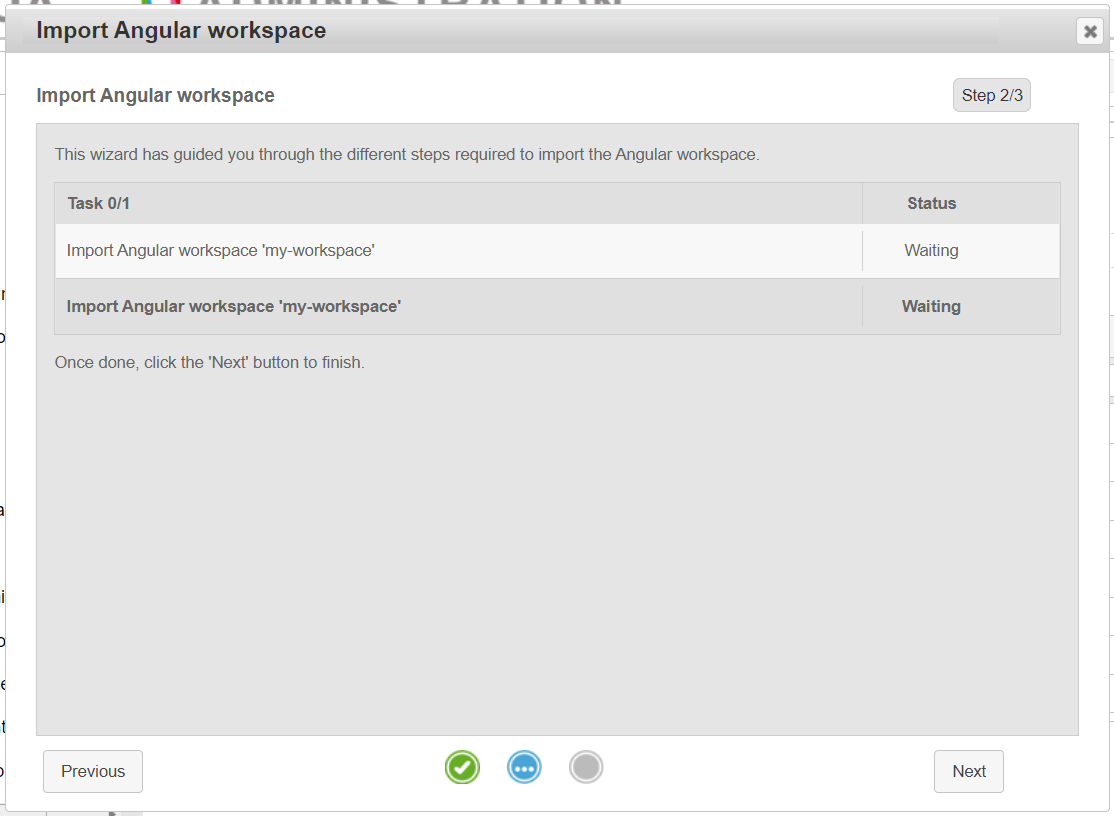 'Import Angular workspace' wizard - page 2
Click on Next when you are ready to begin the import procedure. The import can take some time, once it is complete you can click on the Finish button to view the newly-imported workspace.
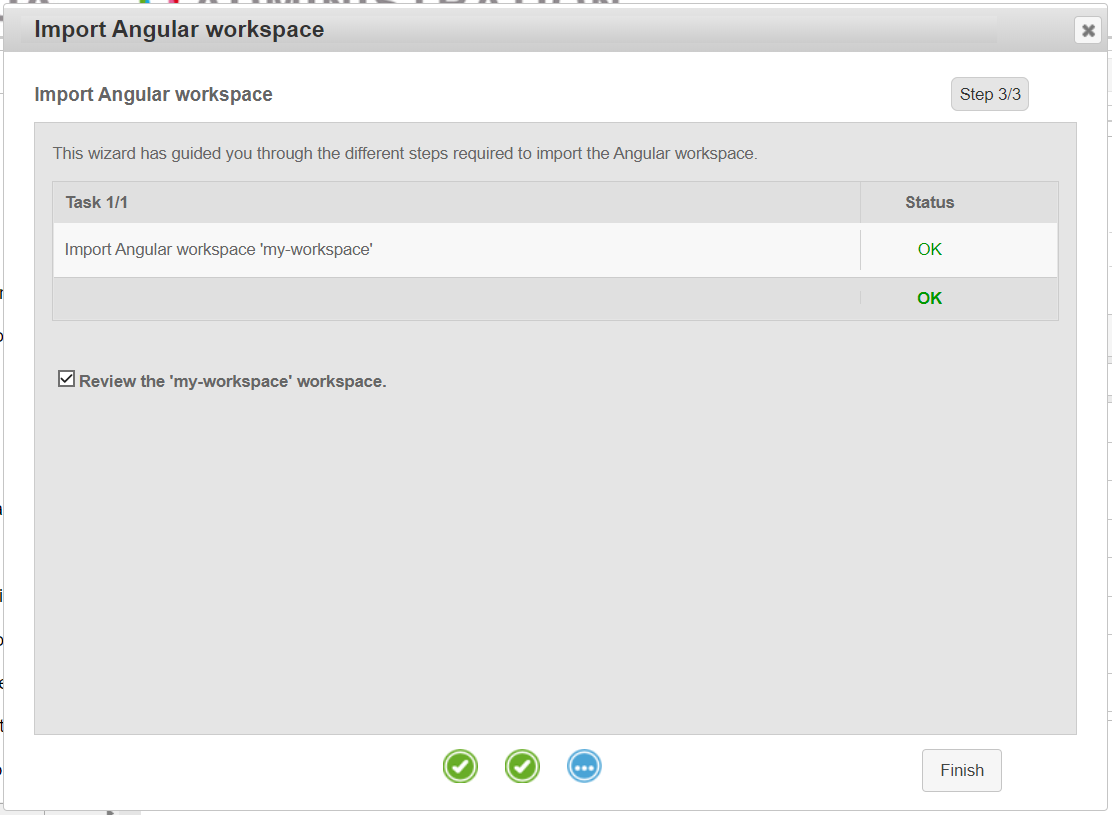 'Import Angular workspace' wizard - page 3 - Finish
Workspace
When opening a workspace in the administration, you will see a variety of information related to your workspace.
Firstly, there is information about the download link of your workspace.
If there are no download links, you can generate them via More actions > Generate workspace zip or
More actions > Generate minimal workspace zip (without 'node_modules' folder).
Note that distributable folders dist and dist-folder are not included in download zip.
Generating a zip file can take a few minutes. You can follow the generation progress either by looking at the banner on the top of Workspaces administration page or by going to Tasks status page, the progress status is named GenerateAngularWorkspaceZip.
Note that if your workspace does not contain a node_modules folder, only the generation action and entry of the minimal zip are shown.
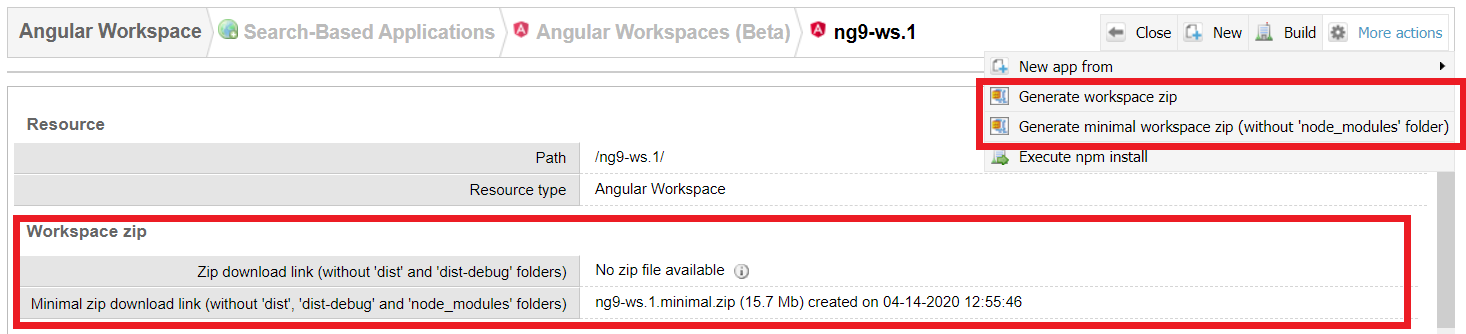 Workspace - Generate zip actions and download link
Secondly, there is a list of all build scripts declared in the package.json file at the root of the workspace.
You can execute the build script directly in the grid or from the Build menu at the top-right of the administration page.
You can follow the script progress either by looking at the banner on the top of Workspaces administration page or by going to Tasks status page, the progress status is named BuildAngularWorkspace.
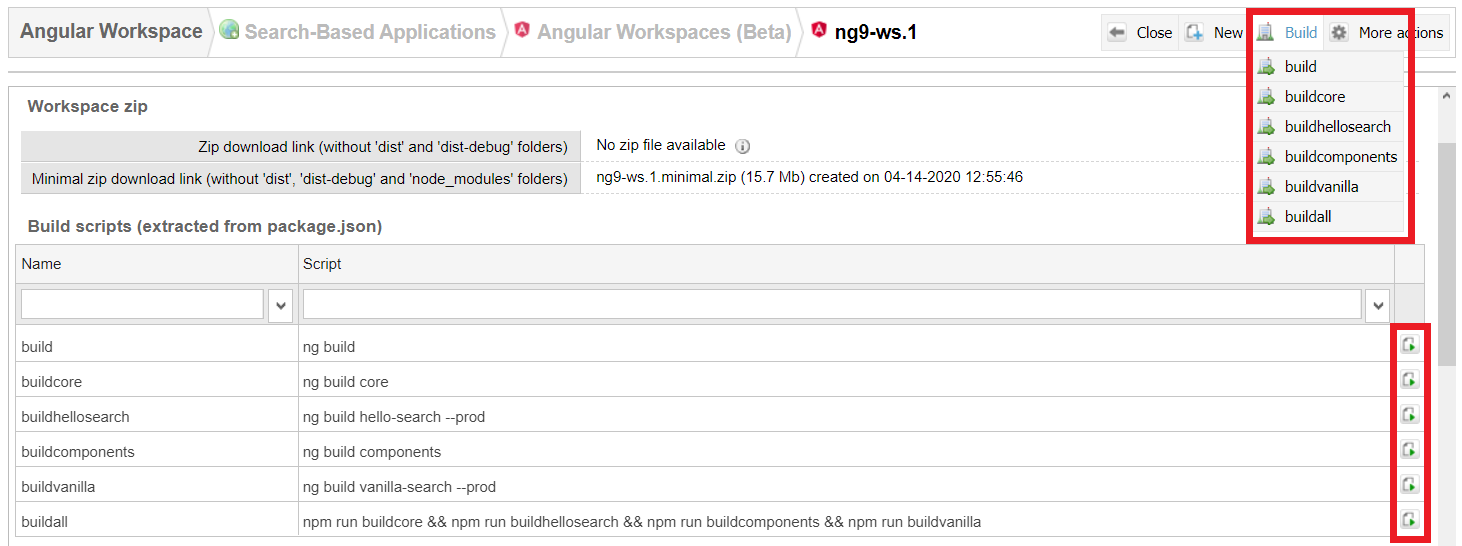 Workspace - Build scripts
The build commands write their result to either /dist or /dist-debug depending on the configuration of the Angular workspace.
This is where Sinequa looks for when serving a particular application.
Obviously, the Angular app needs to be built in order to be served...
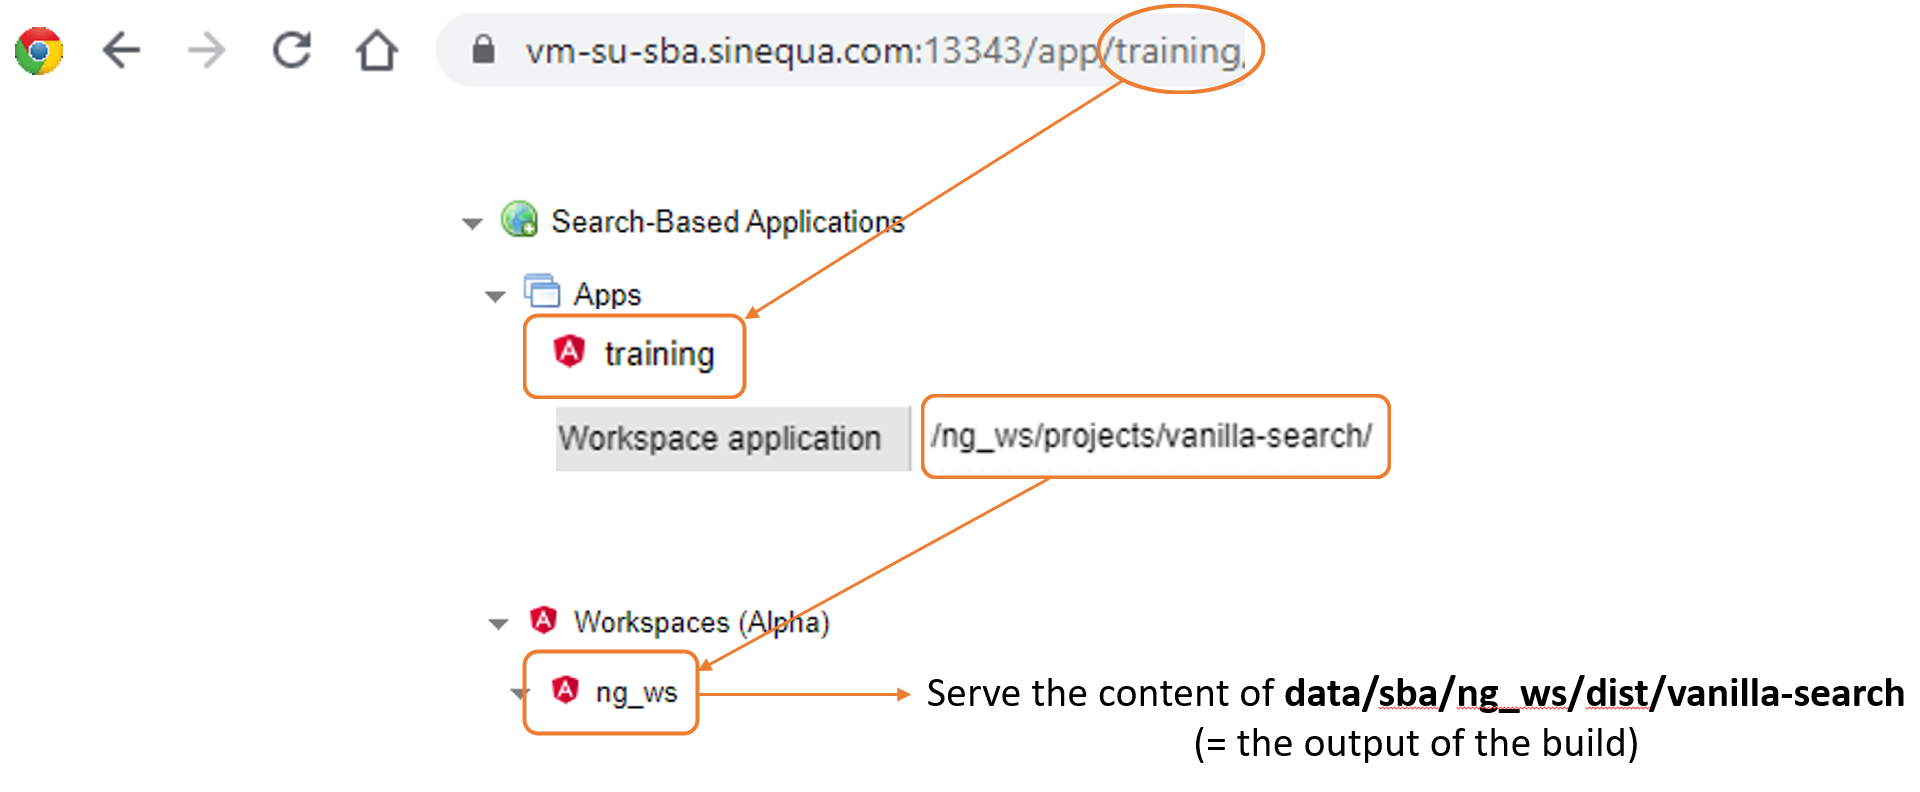 When the app is hosted on Sinequa, the URL contains the name of the App, which itself points to a specific workspace and app
Finally, you can browse the content of workspace folder and that of its files or sub-folders.
Note that the contents of the node_modules folder are not shown in the administration due to their size
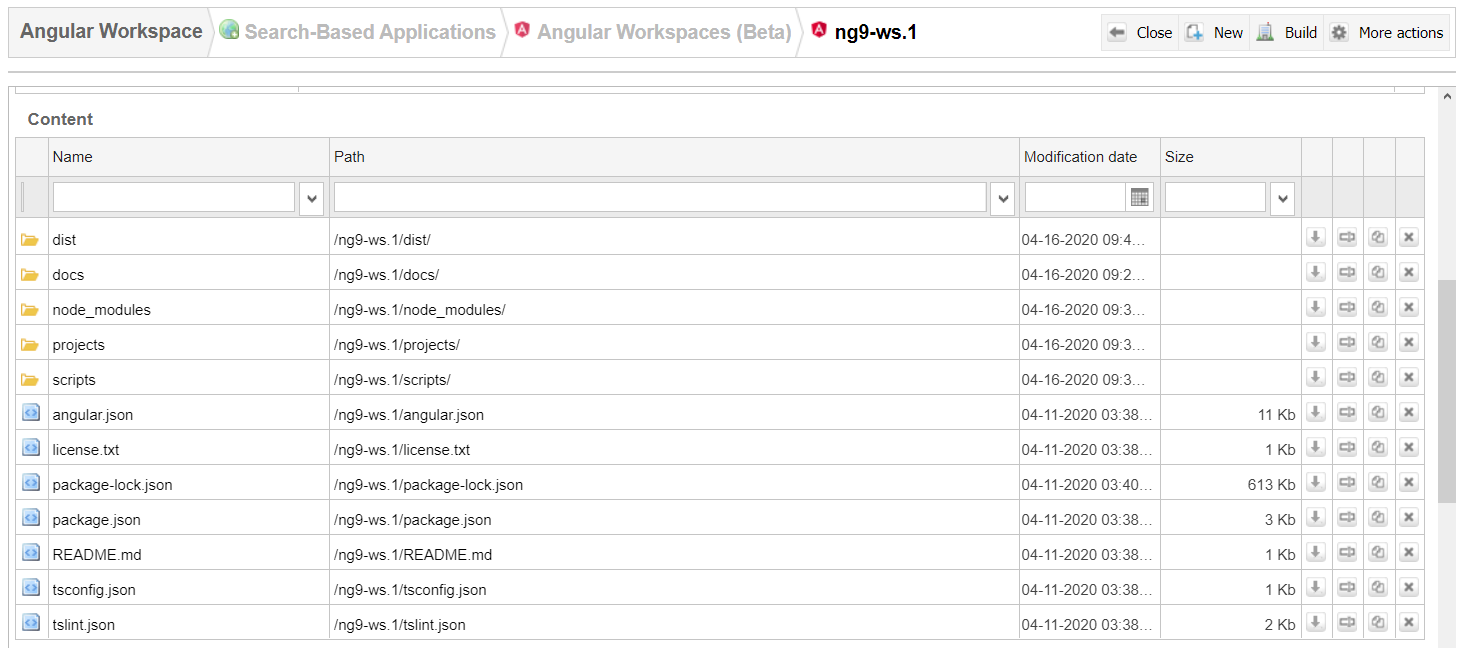 Workspace - Content
If there is a README markdown file in the workspace root, this file is also rendered at the end of the workspace page.
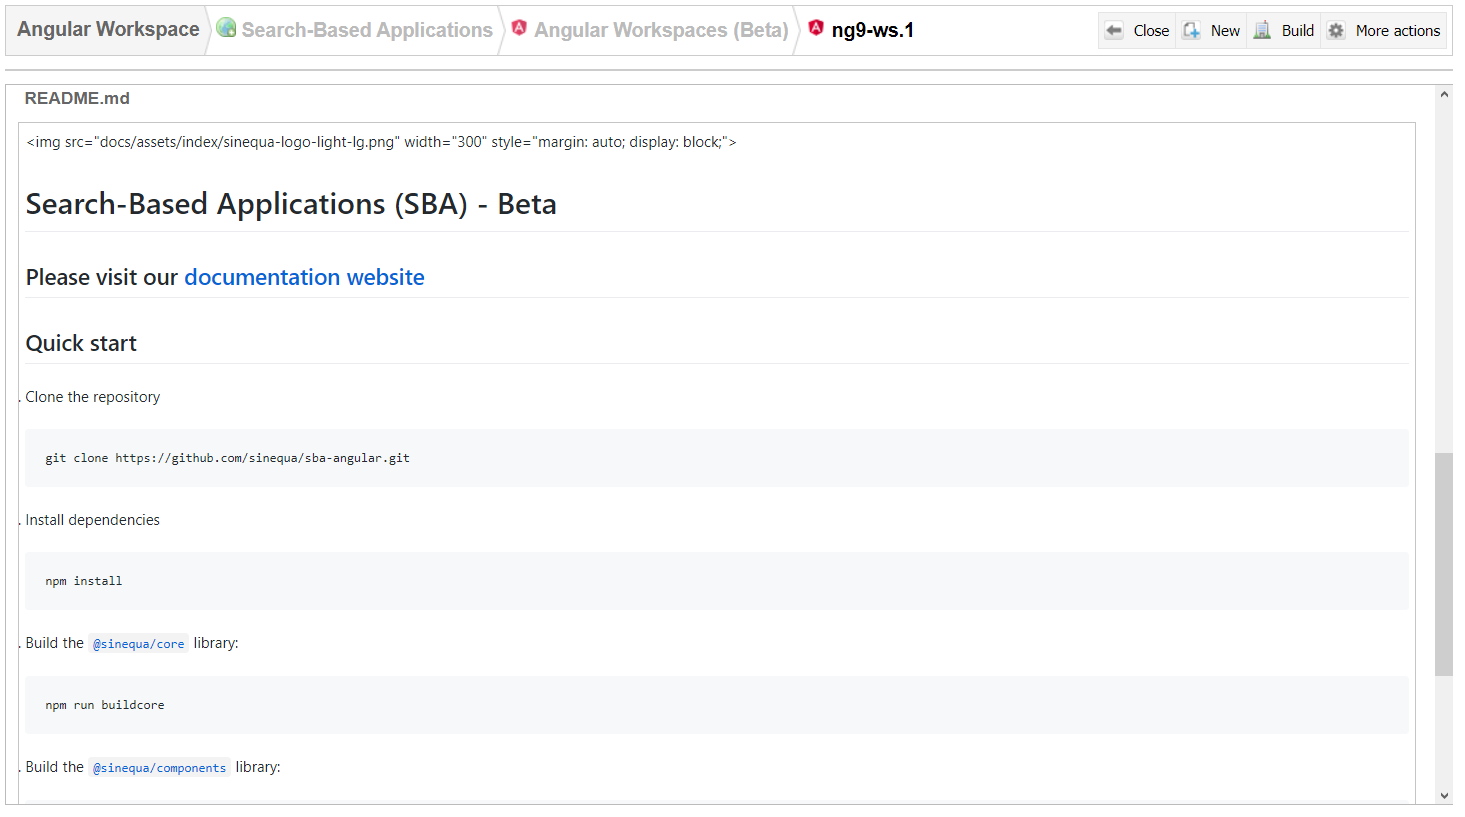 Workspace - README
Other actions with workspace
You can execute npm install directly on the workspace administration page, if the WebApp server has access to the Internet.
By default, this action is disabled on the administration. You need to activate it via Global options > Advanced > Enable 'npm install' (default: false).
You can follow the execution of the npm install action either by looking at the banner on the top of Workspaces administration page or by going to Tasks status page, the progress status is named ExecuteNpmInstallAngularWorkspace.
 Workspace - Execute 'npm install' action
From the workspace administration, you can create an App configuration based on one of the application project of the workspace. To create a new App, go to More actions > New app from, where you can choose the base project for the App.
 Workspace - New app actions
CORS and WebApp configuration
The REST API of Sinequa can be used by a remote application (which is the case when you serve your app with ng serve, without a proxy -- See Connecting to the Sinequa server). Note that this mode causes Cross-Origin Resource Sharing (CORS) issues.
- Distributed Architecture > Webapp > Stateless Mode > Permitted origins for Cross-Origin Resource Sharing (CORS) requests set to the URL you will use to test your app locally. For example,
http://localhost:4200(or just*). - Distributed Architecture > Webapp > Stateless Mode > Return HTTP error codes enabled (default).
As some authentication methods need to store a JSON Web Token (JWT) on the client-side, a cookie must be stored with the SameSite=None and Secure options. This means that the Sinequa API must necessarily be served over HTTPS for these authentication methods to work.